Hello everyone,
I am back with another card for you'll. Today we'll be learning the masking and colouring technique to create a scene card!
Kitty party
This card is a simple one, it uses masking technique to create a scene. The important principle of this technique is that which ever image you would like to be at front create a mask for it. A mask is something that will cover the front image so that if you stamp anything over it, the stamp doesn't affect the front image but makes the second image look like it's behind the front image. Masking can seem somewhat confusing or difficult, but it is actually quite easy. Masks can be created from masking paper or smaller masks can be created using Post-it notes (which I'll be using) . If Post-it notes are used, be sure to stamp a part of the image over the tacky area as the adhesive will help to hold the mask in place.
For this card you'll need:(all measurements are in cms)
Cardstock (let me tell you a little about it)
For the card base, I usually use a heavy cardstock mostly 180 gsm or more. I initially used to check foreign blogs which gave dimensions and if I followed that I would either waste a lot of paper or would fall short of a few cms. We all know the A4 size paper (the Indian size which is similar to UK) it is usually 21x 30 cms, and that is the best size! Till you choose your favourite brand( Papericious and Neenah white, have different dimensions) I would suggest, that cut the A4 paper in half, length wise or breadth wise and score it in the middle to get a perfect sized card base which measures 10.5 x 15 cms.
Supplies:
- Cardstock- I have used Papericious 180 gsm (as this is not an exact A4 size sheet my dimensions are different from what I have told earlier) Base card 11.6 x 31 cms
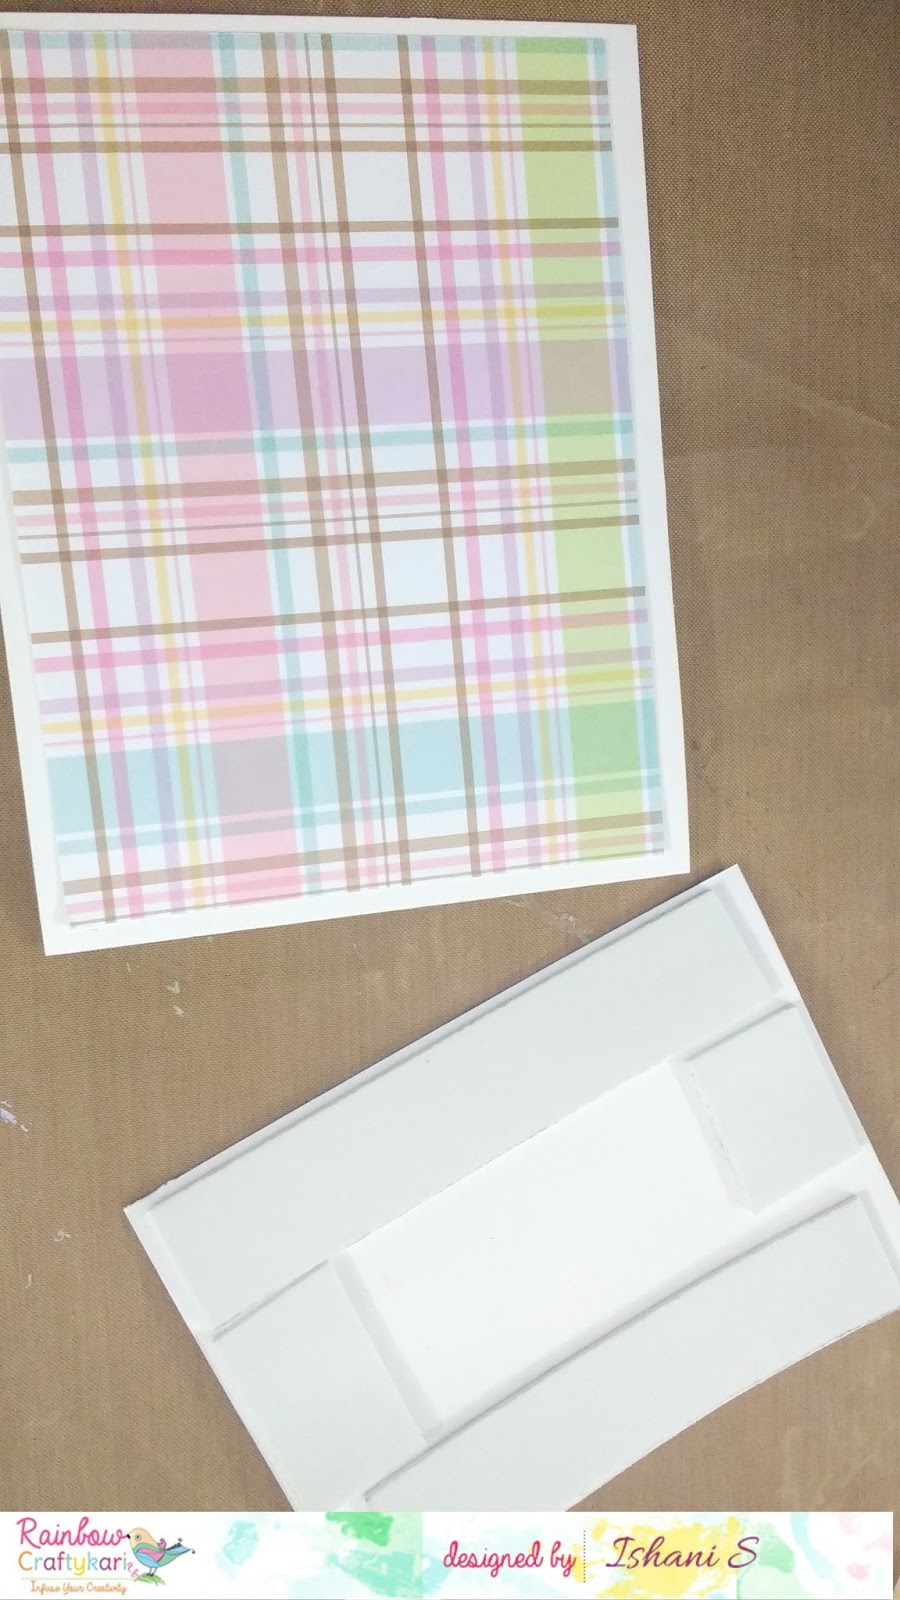
- Papericious Pattern paper 11 x 15 cms
- Pink- Plaid Card panel 10.5 x 14.5
- Stamps (multiple stamps- to create a scene)
- Inks and colouring medium (distress inks and koi brush pens)
- Masking Paper/ Post-it notes
- Masking tape or washi tape
- Embellishments (Stickles, Gossy accents, nuvo crystals- gloss white and sequins)
Let's begin.
1. Cut the base card as per the dimensions and score it in the middle to create a side folding card. Cut a card panel of the said dimensions (You can directly use the base card too for making a card, without the layers and make it a One Layer Card)
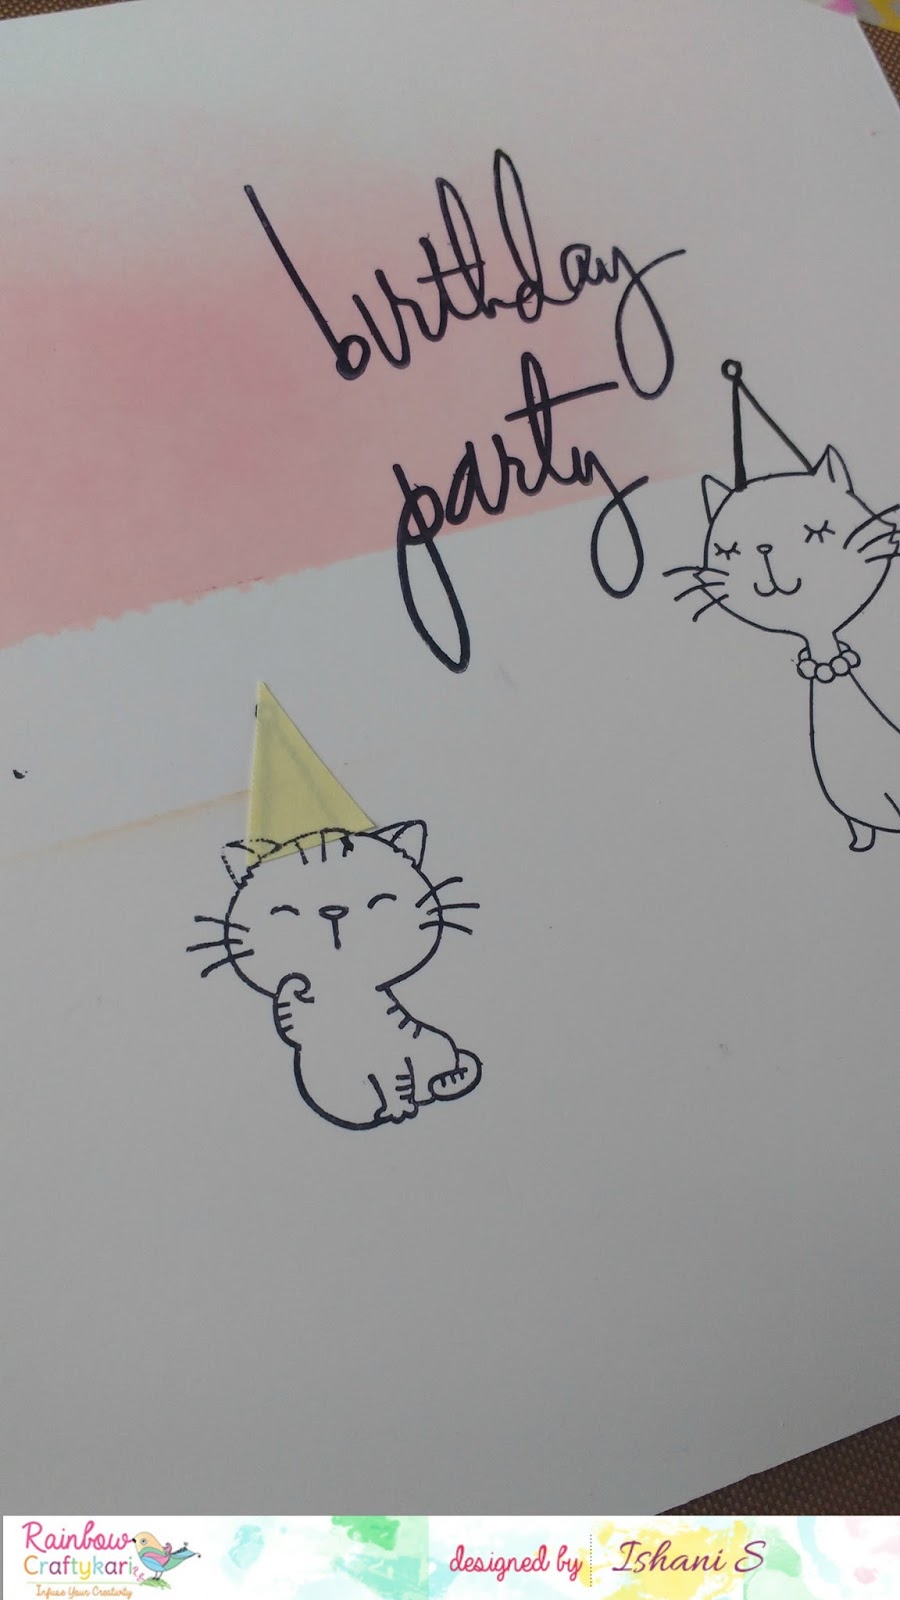
2. To create a feminine background for my card, I put some Washi tape, a little above the half of the card. Then I used a light pink ink and blended above the tape to get a crisp line (which could be a wall in the scene).
3. I used a few stamps from different sets to create this scene. However, the two kitties I would need to be used for masking were stamped on a post it note. Carefully
cut out each image. It is important to cut on the stamped lines. If
images are cut outside of the line, a thin white space or halo will appear
around the image after stamping surrounding images.I did not cut neatly above the tail, as that area will not be impacted by the
images I want to stamp above.
4. Arrange all the components of the scene together until the desired layout is achieved. Taking this extra step helps to visualise the final result and clearly indicates which stamps will appear in the foreground and which need to be stamped in the back (or over the mask).
5.The first thing I stamped was my sentiment, because I didn't want to end up with no space for it later. Then, I wanted to add some party hats to my kitty, but since I don't have a stamp for it, I hand drew them and made a mask.
6. For my birthday girl, I wanted her seated on this cute cushion, so after I stamped the kitty I put over it the mask that I had cut. I then stamped the cushion over it. Do you see the line which got stamped over the post it note? When you peel the mask it will appear as if the kitty is sitting on it!
7. Similarly, for the three kittens I'll have as guests for the party, I wanted one to be behind another. So for that, first stamp the kitten you want in the front, put
the mask over it and then stamp the kitten which should be behind.
8. I stamped the other images, put party hats on all the kitties. The cupcake
and the gifts are from various other stamp sets. I could have used other things
like a banner but I didn't want to crowd my scene.
9. Now, that my scene was stamped, I coloured my kitties and other elements with
the water based sketch pens. I used water brush to dilute the colour and give
some lighter shade.
10. The scene was ready to be put on the card base. I took a pretty pink plaid pattern paper, which had similar tints like my colouring. I cut it in dimensions 5 mm lesser than my base card and stuck it on with a double sided tape. For the card panel I used 3d foam double sided tape and then stuck it on the pattern paper.
11. For some added interest I used Ranger Stickles stardust on top of the hats, glossy accents on the hats and the bow and some nuvo crystal drops for the pearl necklace and on the 'i' of the birthday in the sentiment. I used golden and pink sequins for some glitter.
Hope you liked this little kitty party scene and will try the masking technique when you create a card.
Almost all above mentioned products are available at the Rainbow Craftykari store for can be pre-ordered by sending a mail at rainbowcraftykari@gmail.com.
Happy Crafting!


So cute scene with beautiful masking work, love it Ishani!
ReplyDeleteAm glad you liked it! Thankyou so much :)
DeleteSooooo cute, lovee it :) thanks for the awesome tutorial
ReplyDeleteAww.. Thankyou very much Preeti 😍
DeleteAdorable card Ishani ! Those critters look cute enjoying the party :) I am amazed by the coloring ,you got superb effect, that too on sigma cardstock :)
ReplyDeletePooja you are so kind, am so glad you liked it. Thankyou so much :)
DeleteBeautiful work :)
ReplyDeleteThankyou very much Karthika :)
Delete