Showing posts with label DT Priya Mishra. Show all posts

Monday 20 November 2017

Mixed Media Wooden Piece Tutorial by DT Priya


Hello Crafty Folks,

A very good morning to all of you.I'm back with a Picture Tutorial for a Mixed media Wooden Piece. Here I have explained how I have made this piece totally out of scrap. Except for colouring and glueing you don't need any supplies to make this kind of a project.
Here is what I made....


So let's Start...


Step 1:
I had this wooden plank which is about 2.5 feet in length. You can take any base be it wooden or canvas, Procedure will be the same. I used some masking tape on corners and sides to fill the uneven parts. Also attached a hook at the back so that I can hang it on my wall.


Step 2:

I gave it a coat of white gesso.


Step3:

Here you can see the things I have used on the base to create textures. Some negative of chippies, Gauze cloth, Twine, some nails, buttons, tissue paper, pista shells, broken pencils, tags, broken toys etc.


I cut and glued the negative chippies on the base as shown in the picture below and also tied some twine on desired spaces.


Step 4: 

Then I arranged some gauze around the chippies and adhered some corrugated sheet here and there and also attached lace at few places.


Step 5:

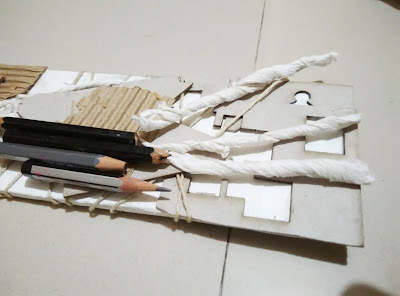
Then I arranged tissue rolls, some chipboards, metal charms, tags, broken pencils and other embellishments using 3d matte gel.


Here are some close-ups of the arrangements in case you are interested.


Step 6: 

Then I gave a coat of white gesso on it after all things dried up. Also used a light coat of Decoart crackle texture paste here and there.


As you can see I arranged some broken jewellery pieces on it to add more textures and finally added a butterfly chipboard to give some height.

Step 7:

Then I started colouring this after it is fully dried. Firstly I gave a coat of Chalk paint Sailing sky and Mint green Patina Paste. Then I started dry brushing with Rust and Brass Patina paste mixed together. Also rubbed blue patina paste here and there for the effect.


Supplies Used:

Wooden PlankPapericious White gessoFinnabair Patina Effect Paste ( Mint Green, Blue, Rust, Brass)
Deco Art Crackle Paste

Rangers 3D Matte Gel

Acrylic paint Rust

Papericious ChipBoards

Corrugated sheets

Laces
Gauze


You can get all the above-mentioned products from Rainbow Craftykari Shop or can pre-order by sending an email to rainbowcraftykari@gmail.com.


Also, do not forget to participate in our ongoing challenge here and check out other gorgeous projects and tutorials from our awesome Design Team.

Hope you like my project.

Hugs,

Priya

Monday 6 November 2017

Shabby Chic Jewelry Box by DT Priya Mishra

Hello Crafty Friends,

A very good morning to all of you. I'm Priya again with a photo inspiration post. This time I transformed a boring box into an interesting shabby chic jewelry box. 


The box I used is a drawer box and is beautiful inside. I just cut some pattern paper according to the dimensions and glued on it. So, here's the box I altered...


I cut the pattern papers according to desired measurements, distresssed the edges and glued on all sides of the box. Then I adhered some pearl string and rhinestone string on the top cover of the box. also some strings on the front opening of it. Then I adhered a beautiful leaf pattern lace on the top cover and attached a mandala die cut, some flowers, pearl stickers, twines and some more lace to decorate it.


Supplies Used:

Cardboard Box
Martha Stewart Score Board
Guillotine Paper Trimmer
Scissors
Eno greeting Pattern Paper
Papericious Lace
Twines
Tacky Glue
Distress Ink
Double sided Foam Tape
Chipboards
Flowers
Paper Flowers
Diecut
Pearl String
Rhinestone String
Pearl Stickers

Hope you are inspired. 
You can find all the above mentioned products from Rainbow Craftykari Store or you can pre-order the same by writing to rainbowcraftykari@gmail.com. 
Also do not forget to play along with us at our monthly challenge here.

Hugs,
Priya


Monday 16 October 2017

Diwali Lamp Inspiration by DT Priya Mishra

Hello Crafty Friends,


Priya here today with an Inspiration post for you. 


Today I'm going to share a Lamp. This is Diwali month and you all must be busy decorating your house. Then why not something handmade, quick and attractive. 


Here's my project...


Well, it was not very quick but I had fun making it. No, I have not followed any cutting files for this, made my own drawing here. Used a lot of things from my stash and a lot of new things too.


These are the materials I used to make this and I listed the same at the end of the post. So, for this first, I drew the outline of the lamp on a piece of paper and traced the same on the patterned paper. Then I cut out the unnecessary parts and attached vellum on the window panels. Then I assembled the lamp. 


After the upper part is done, I used a thermocol sheet to make the base of the lamp, so that it can stand properly. I cut it in a hexagon shape and attached cardstock on both sides to give it more strength. Then I attached the empty aluminium foil roll into it and covered the whole part with patterned paper. Then for attaching the lamp also I cut a small thermocol sheet and covered it with patterned paper and attached it to the tissue roll. Once the base is dried completely and looked firm, I attached the lamp on it.


Here, You can keep it unattached and adhere a tea light on it also. I'm planning to do that in future.


Then I attached laces on the borders to make it look more attractive, also attached some flowers which are from the store. Some leaf die cuts here and there and my lamp is ready.


Some more images 


Materials Used:

  • White Cardstock
  • Enogreeting Paper Pack
  • Vellum
  • Papericious Lace
  • Thermocol Sheet
  • Empty Foil roll
  • Flowers 
  • Die-cut Leaves
  • Tacky Glue
  • Paper Cutter
  • Scissors

Hope you like my work. You can find all the above materials at Rainbow Craftykari Store or pre-order by sending email to rainbowcraftykari@gmail.com.

Don't forget to participate in the challenge here and you can win lots of exciting prizes.

Hugs,


Priya


Wednesday 27 September 2017

Altered Color Mixing Palette by DT Priya

Hello Crafty Friends

Good Morning. 

Priya here today with my Inspiration post for the month of September. This is a mixed media altered project again...Ya, I love them.

I have seen many altered palettes... but all of them are wooden or MDF, so I thought why not to alter a real palette...that I use or no longer use. 

So, here's how it looked after all the hard work... 


For this I sanded the palette a bit then added 2 coats of heavy gesso. I layered gauze cloth on one side and corrugated sheet on the other side of this. Then I added some stones, Chipboards, sea shells, Metal and resin embellishments to create layers. Then I started coloring. I used metallic paints here in shades of purple, pink and blue.

Finally after it dried completely, I adhered two paint brushes on one side of it.
Here are some more close up shots


Supplies used:

Any Color Palette ( Here I used Round one)
Art Basic Heavy Gesso White
Corrugated sheet
Gauze
Papericious Chip Boards 
Art Stones
Buttons
Metal Charms
Sea Shells
Painy Brushes
Metallic Paints

You can find all the above mentioned products at http://shop.rainbowcraftykari.in/ or preorder by email to rainbowcraftykari@gmail.com

Hope you like my project. 
Do not forget to participate in our ongoing challenge Here

Hugs,

Wednesday 13 September 2017

Hexagon Gift box tutorial by DT Priya Mishra


Hello Friends,


I am Priya with you today sharing a detailed tutorial for making a small gift box. Diwali is round the corner and I'm sure you people are creating awesome stuff for gifting. I made this box for gifting. You can put some candies or chocolates or any small gifts in it.


This is the  box. As you can see, it has a small handle, yes you can hold it from here and don't worry it won't open up. Though it is tiny, it is made really sturdy.


So let's start the tutorial...

Step 1: For this I took two pieces of white card stock measuring 9 1/2" * 4 1/8" and scored them on long side at  1 1/2", 3", 4 1/2", 6', 7 1/2", 9" and short side at 1 1/4"* 2 1/2". I am sharing both the pictures back to back for easier understanding.


P.S: These two pieces will be the cover and box part.


Step 2: Now, I cut the scored lines as below. The bigger squares were cut along the straight lines  and the other side is cut in a slightly triangle shape. This is for both the pieces.


 After cutting, both the pieces will look like this.


 Step 3: Now I cut along the short scoreline leaving the middle part. This is to join both ends.


Both the card pieces will look like this now.


Step 5: Now join both the ends of the box. I used regular white glue for this.


As you can see, both sides are joint now, I'll make the body next.


Step 6: Now I applied glue on the short sides of the box which were cut in slight triangle corners and glued each panel inside.


Now after gluing all the panels, it looked like this. This is the open side of the box.


Step 7: Now I turn the box and start attaching the bottom panels.


I'll take two panels facing exactly opposite to each other and stick them as shown in the picture.


Then the next two panels above them.


And finally the last two panels and this is how the bottom of the box will look like.


This is how it looks from inside.


Step 8: Now I repeated the same steps for the other card stock and here are the final two pieces.


Step 9: I made both the top and bottom panel of the same size, I made a stopper panel for the lower part of the box, so that the lid falls exactly in place when I close it.


For the stopper panel I took a card stock measuring 6 3/4"* 2 3/4" and scored it on long side at 1 3/8", 2 3/4", 4 1/8", 5 1/2" and on short side at 1 3/8". I applied glue on the short side as shown in picture and fold it.


Like this.         


Step 10: Then I glued this inner panel piece to the inside of the lower part of the box. I kept it short by 1 side of the hexagon so than I can attach both upper and lower part of the box here.


Step 11: For the inside joining panel I took a card stock measuring 1 1/2"* 2 1/2* and scored in long side at 1 1/4"


Step 12: Now I glued this piece to the top and bottom piece of the box as shown in the picture.


And the box looks like this when opened.


And like this when closed.


Step 13: Now the box is ready. I'll start embellishing it a bit so that it looks like a gift box. For the embellishment, I cut small pieces of paper for the sides of the box. So total 12 pieces for sides. Dimensions are 1 3/8"* 1 1/8"


And attached them like this.


After I finished, the box looked like this.


Step 14: Now I cut 4 circles out of white card stock in the dimension of 1 1/8" and pattern paper of 1". This is for the inside and outside top and bottom part of the box.


Step 15: Now I attached one set of circle to the outside base of the box.


And like this to the inner side of the box.


Step 16: Now I cut a piece of card stock measuring 6"*6/8" for the closing flap of the box and attach pattern paper on it.


Step 17: I attached this flap on the top of the box and glued the last set of circles on that. For smoothness in closing and keep it intact, I attached small magnet on the lower side of the flap and inner side of the box.


Step 18: Now I cut another two pieces of pattern paper measuring 4 1/2"* 2/8" and glued them together to make the handle of the box and scored it at 3/8 on both sides and glued on the lid of the box and it looks like this.


After I made this, I so loved the idea that I made a few more with different dimensions. 

Here's the full family...


Hope you like this tutorial and try make some for yourself. 


Supplies Used:
White Cardstock
Papericious Grey Bloom Paper pack

Papericious Rose Wedding Paper Pack

Martha Stewart Score Board

Circle Cutter

Scissors
White Glue

All the above mentioned materials are available at the Rainbow Craftykari store and can also be pre-ordered by sending a mail to rainbowcraftykari@gmail.com

Don't Forget to participate in our Ongoing Challenge

Hugs,
Priya