Showing posts with label GDT Post. Show all posts

Monday 6 March 2017

Recycle Empty Tape Roll Photo Frame Tutorial by Our Guest DT Mounika K

Hello Crafters,

A lovely Good Morning to you all,

We are back today with an awesome tutorial in our Teaching and Learning Program. Our Guest DT Mounika has recycled the glue tape rolls into a beautiful photo frame. So from now onward don't throw your rolls but create a beautiful frame like this. Sit back and enjoy the tutorial.


Over to you Mounika,

Hi everyone,

I am so happy to be part of Rainbow Craftykari Guest Design Team member, my heart-full thanks to Maninder Kaur and Team for this opportunity.

Today as part of GDT I am going to show you  how to create photo farm using empty tape rolls.


We
start with clean the tape roll and softly sand them to get rid of any stickiness and dirt on it. To prepare the base give two coats of gesso and let them dry.

Trace the circle on chipboard using the rolls and cut them for the base and also cut three extra circle in different sizes and pattern papers for the same and distress the edges.


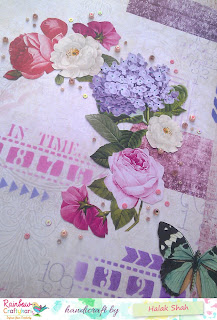
For this I have use Papericious the Floral Season Collection.


Using
Camel texture paste and stencils to create some texture on the rolls and let it to dry. You can use any stencils of your choice.


Once
they are dry, dab them with some acrylic colors using sponge brush, I have used green and blue colors.


Place
all the circle together to make a frame as shown in the picture below and adhere them using white glue. Don't disturb until it dry completely.


For
embellishment, I have arranged mulberry flowers and some lace flowers, once I was happy with the arrangement I adhere them using glue gun or you can use white glue. As I thought of love theme for this project I choose camera, couple birds and dragon fly, arranged them once I am happy with arrangement, adhere them using glossy accent left them undisturbed for some time.


In
the middle frame I adhere a photo and on left side I glued some twine, pearl string and heart, for which is distressed with mustard seed and seedless preserve distress inks and added some diamond dust on it. And for the last frame I added a sentiment and some lace to finish off it.


Here are few close up of finished work,


Materials used

Empty tape rolls
Pattern papers – Papericious The Floral Season & Golden Garden
Chipboard
Acrylic colors
Stencil
Gesso
Texture paste
White glue
Distress inks
Mulberry flowers
Pearl stings
Metal charms
Hope you all enjoyed the tutorial.

Above listed Materials are available at Rainbow Craftykari Store or you can pre-order to them by sending an email at rainbowcraftykari@live.com.

I hope i have inspired you all to make the beautiful project by recycling it. Don't forget to participate in our monthly challenge, "Revamp your Scraps" and grab a chance to win a prize. Checkout the details at
https://tinyurl.com/gn46msc

Regards,
Mounika.

Friday 6 January 2017

Layout Tutorial By Guest DT Halak

Hello Lovely Crafters,

A very lovely Welcome and a warm Good Morning in this cold winter.

Today in our Teaching and Learning Program we have aour Guest DT Halak Shah with a lovely Layout which she made with one paper pack. Sit back and enjoy the tutorial.

Over to you Halak,

Hello and good morning dear friends!
I'm Halak and today I have this layout to share with you.
 

Before we begin, let me list out the basic materials :

Paper Pack - Ephemera by Papericious

Round Ink Blending Tool by Papericious

Stencils :

1. Art Is - TCW
2. Labyrinth - TCW
3. Stylish Borders - Hero Arts
4. Rhapsody - Memory Box
5. Andy Skinner
Distress Inks :
Primarily used Wilted Violet and Picked Raspberries
Red striped washi tape and
Polka dotted washi tape
Inkadinkado alphabets and numbers cling stamp
Brads by Kaisercraft
A 1" circle paper punch (I've used the one by EK Success)
And lastly,
Pink beads + Sequins.

Tip: If you do not have beads, you can opt for different sized sequins too! Alternatively, micro beads / seed beads and glitter will also look fabulous!)

Okay, so, layouts... what are they? Something on the lines of a journal, layouts are meant to add an image and jot down something, (a line or two max) about that image... capture a memory and freeze it in time...

While journals can be highly personal, layouts are primarily created to be displayed. They can be framed or bound in a book, the choice is yours!

Here's a fun close up!

My layout is a 12" x 12" piece intended for framing.

Let's get started!
The first thing I did was open the paper pack and fussy-cut some elements to use as embellishments.


After that I went through the sheets and cut out some sentiments + punched out some circles using the paper punch.

Took the Andy Skinner + Hero Arts stencil and slowly started building up layers.


Why stencils?
Stencils are a great investment, because unlike embellishments, you can use the same stencils over and over again. They help give the illusion of layers and add interest to a project without actually adding bulk to paper so it makes your project look good without the added weight! Win-win!

Next, I took Labyrinth and Rhapsody stencils and added more patterns to the paper.


Tip: If you want a dimensional look, you can use modeling paste with fun ink sprays / acrylic paints!

After this, I took some alpa and number stamps by inkadinkado and lightly stamped them in the background.
At this point, I was quite happy with the way the background looked so I decided to stack up my embellishments + accessories to ascertain positioning.


Tip: I always roughly position where I'd like to place my embellishments / accessories and click a picture to make note of it. I move around the pieces a couple of times, click pics and then pick the one I like best. It's always a good idea to plan where the embellishments and accessories go before you glue / tape them in place.

The next step was to adhere everything in it's place.
Once that was done I took a big white brad which had a lovely flower design on it and added it to my project. Also added an additional big butterfly die-cut.
Finished it off with some stenciling + added washi tape bits and adhered the beads and sequins!
I absolutely love that floral arrangement decked with beads! Here's another close-up :


But wait! If you think that was all then I have Surprise for you all
As a bonus, Here's a card I made with a very detailed coloring tutorial.

Materials used :

1. Altenew - Wild Hibiscus stamp set

2. Poppy Stamp Die - Hello Word Balloon
3. Big Shot or any other compatible die-cutting machine
4. Staedtler Luna Coloring Pencils (Set of 24)
5. Ranger Archival Ink - Black
6. Cardstock
7. Cotton swabs
8. Baker's twine (black)
9. Paint brush (I used size 0 brush)
10. And lastly, some embellishments like sequins and rhinestones
 

The first thing I did was stamp the flowers with the butterfly onto white cardstock using my favorite, archival ink by Ranger.


I also took my hello word balloon die and die-cut the sentiment I wanted to use in black cardstock.


Next I took the color pencils and colored the images.
Here you can see my quick coloring.


I took the brush and with a little water, smoothed the pencil lines. That led to this subtle water colored look.


At this point I did like how the colors blended but they were a tad too light for me. So I decided to intensify the colors a little.

Check out the image below, the flower on the bottom left is the one where I began working. The first 5 petals when you compare with the previous image, you will notice that the colors have intensified.


To achieve this all I did was color a little over the petals using the same color pencils and then smooth it using a cotton swab!
I repeated the exact same process on the other flower and the butterfly after which the image looked like this.


I only wanted the sentiment minus the bubble so I trimmed it and adhered, matted the whole thing onto navy blue cardstock, added some twine and adhered embellishments to finish it off!
Here's the finished card.


What I absolutely love about the project is the coloring bit! So how could I end this post without a close up?! ^__^ Here you go.

That brings us to an end of this post dear friends! I hope you enjoyed my tutorial and it helped you learn something new.
A special thank you to Team Rainbow Craftykari for once again giving me the opportunity to share my papercrafting experience.
Till next time! *Big Panda Hugs*
Above listed Materials are available at Rainbow Craftykari Store or you can pre-order.

Regards,
Halak