Hi Lovely People,
Hope you are enjoying the lovely onset of winters? Well, I am most definitely enjoying it with a hot cup of tea all snuggled up in my cosy blanket ;)
There is definitely something amazing about this season with the winter chill, celebration & wedding vibes all around which makes it a December to Remember always.. as they say, "last one but the best one" .. ;)
Without boring you anymore with my love for winters I will take you straight to today's post.
Today I am sharing two CAS cards with you (CAS: Clean & simple Cards), CAS cards are a challenge for me as much as it for most others but this time I decided to do a tutorial on it for you I hope I do justice to your expectations :)
Let's begin
Card 1:
Step 1: I started with taking a white cardstock, Base dimension: 4.5"X10" & scored it at 5" & now my card measures 4.5"X 5"
Step2: Next I stamped my images Piggy & the fence using Versa onyx ink on a separate cardstock & coloured using the DUO watercolour pencils& fussy cut them.
Step3: I adhered the fence right in the middle of the card using the double-sided foam tape & then the piggy half over it.
Step 4: Lastly, to complete the card I picked the sentiment "I miss you PIG time" & using the Versafine Onyx black ink I stamped the sentiment right below the fence.
Tada our first card is ready :D easy ain't it??? ;)
Moving onto the 2nd Card:
Step1: I again picked the cardstock in the size 4.5"x10" & scored it at 5" to make my card measuring 4.5"X5", I also cut out a cardstock in 4.25"x4.75"
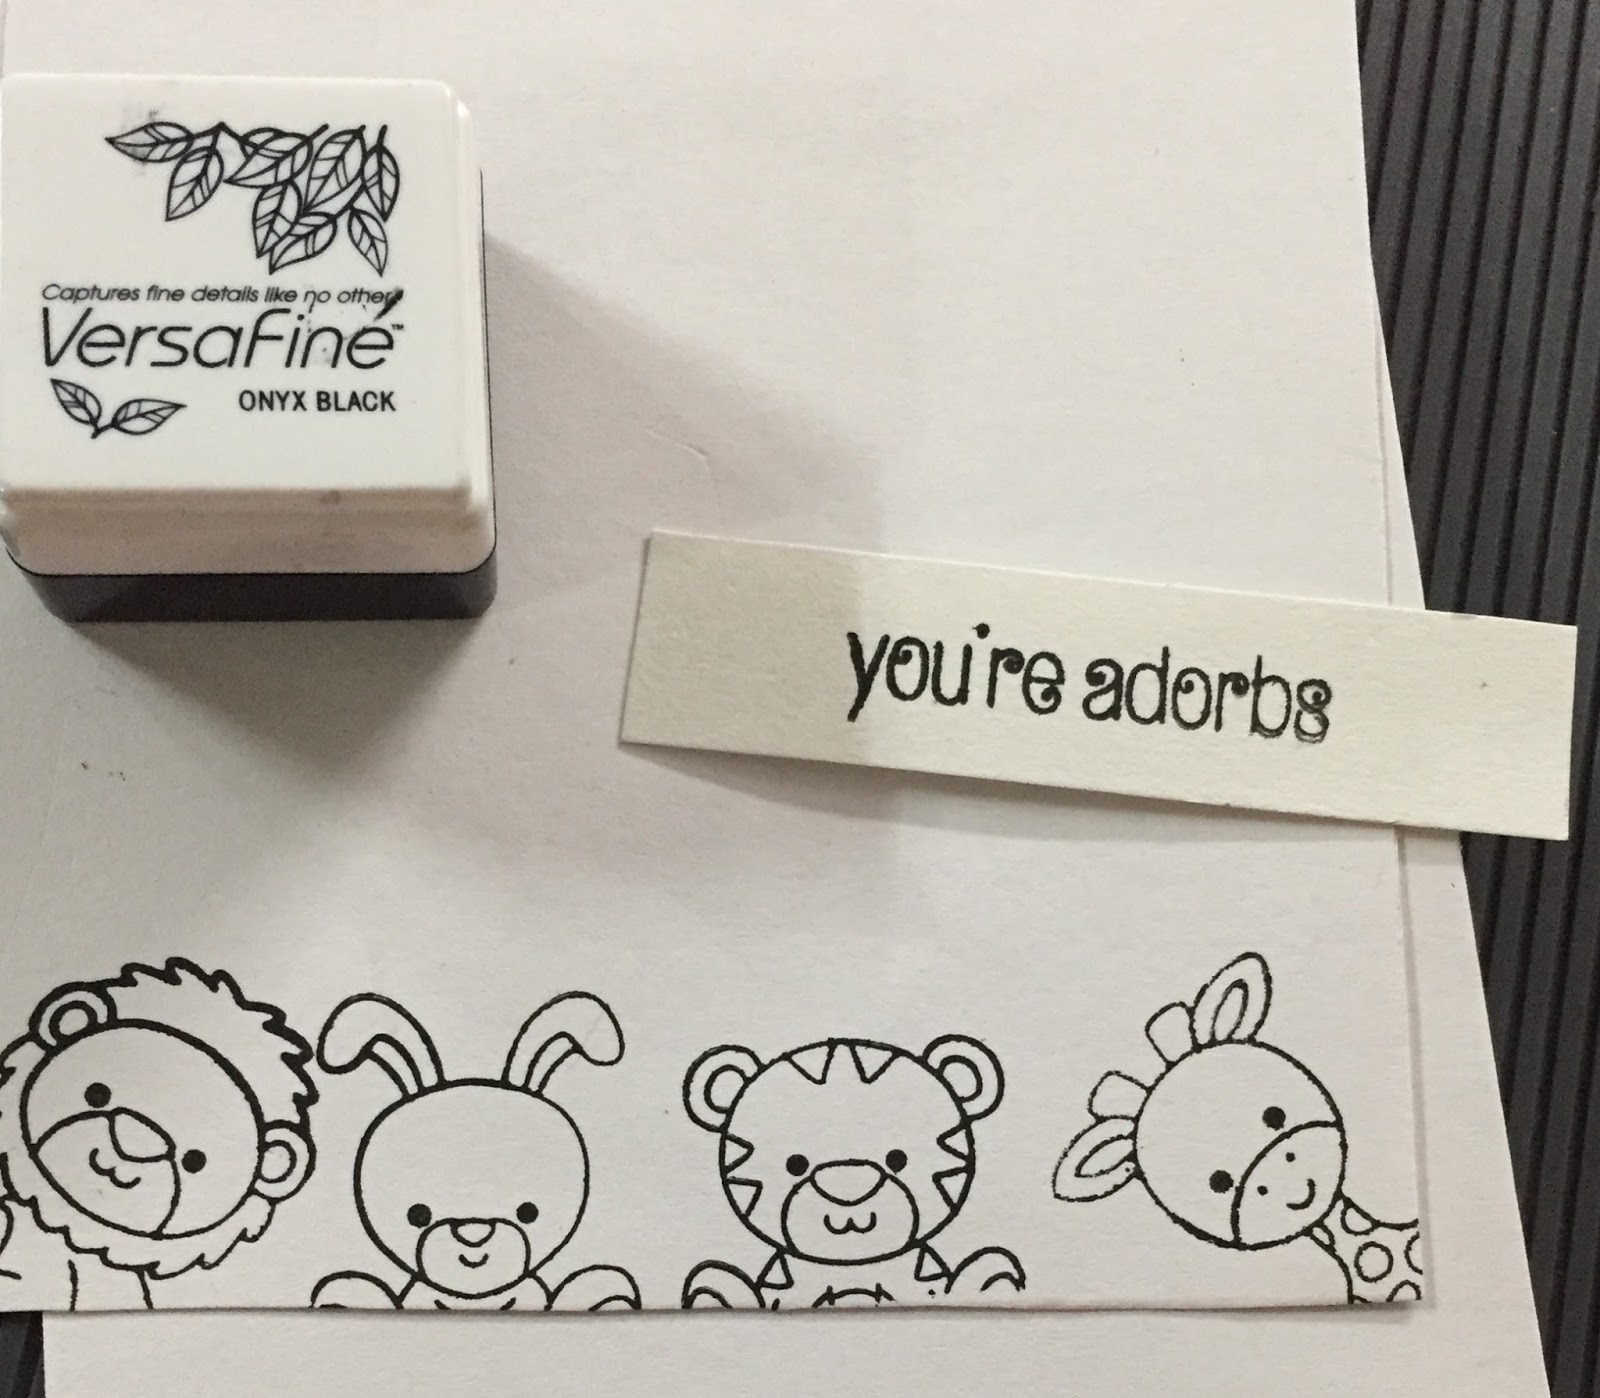
Step2: using my VersaFine Onyx Black ink I stamped images using Clearly Besotted stamp set- I stamped with the animals at the bottom, with just the faces, to give it a look of the animals peeking out and picked the sentiment from the same stamp set & stamped it on a separate tag.
Step3: Using DUO watercolour pencils I coloured the stamped images & distressed the edges of the card stock.
Step4: Using an orange gingham print washi tape I added it above the animals & adhered my stamped sentiment using the double-sided Foam tape
Step5: Lastly I adhered the cardstock to my scored & folded card & Lalala! the card is ready!
Here are some more pictures:
Materials used:
1. White Cardstock
2. Clearly besotted stamp set
3. Versafine Onyx Black ink
4. Duo watercolour pencils
5. double sided foam tape
6. WRMK score & cut
7. Tsukineko ink in dew drop size
Almost all of the material mentioned above are available at the Rainbow Craftykari store or can be pre-ordered by sending an e-mail at rainbowcraftykari@gmail.com.
Hope you enjoyed the tutorial.
Good morning crafters!
How are you today? This is Khushboo here, back with another round of Inspiration Post at Rainbow Craftykari.
Often times we strive to create our projects that look different from others. All in an attempt to maintain uniqueness. But with a pre-defined set of embellishments available in the market, our projects end up with similar elements. What fun it would be if we could create our own embellishments?
This post is all about creating your own 'Art Tiles' that are not limited by colours, styles or materials!
Let's take a look at some of the art tiles that I created, and then move on to a brief on how I made them!
Brief Steps for creating 'Art Tiles':
Take your medium weight chipboard and cut it into a square (1x1 inch) and rectangle pieces (1.5x1 inch). Gesso some of the pieces with white and/or black gesso.Cut and stick some pattern paper of the same size as your chipboard pieces - these will be your base before you start stamping.
Collect a variety of intricate stamps and start stamping randomly on your pieces. It could be any motif - butterflies, scripts, flowers, etc. Don't forget to stamp sentiments on some of your tiles too!
Take some coordinating distress inks and ink up the hell outa these tiles! Throw in some color, make the stamps pop!
To add some mystery and class, distress the sides of the tile with Black Soot Distress Ink or Black Archival Ink. It absolutely brings out the beauty of every element on your tile!
You can leave some tiles plain, or you can add rhinestones, flowers and glitters on some - like I've done.
Now comes the fun part - Glossy Accents! Lay your tile on a flat surface and cover it entirely with Glossy Accents. Don't be a miser! Use the GA luxuriously - coz once it dries, it'll give a glassy/raised/embossed effect to the whole tile.
Let it dry completely for a few hours - and voila! Your tiles are set to be added to your projects!
Materials used:
- Chipboard
- Gesso
- Glossy Accents
- Acetate
- Stamps
- Sentiment stamps
- Black Archival Ink
- Distress Ink
- Rhinestones
- Flowers
- Glitter
- Pattern Paper
- Chain
- Glue
Hope you guys enjoyed my creations. Can't wait to see how you add your own twist to this!
Above mentioned products are available at Rainbow Craftykari Store OR you can pre-order the products by sending email at rainbowcraftykari@gmail.com
Don't forget to participate in our ongoing challenge. Link your projects here
That's it from me, folks!
Signing out,
Khushboo R. Gandhi
Hello Everyone,
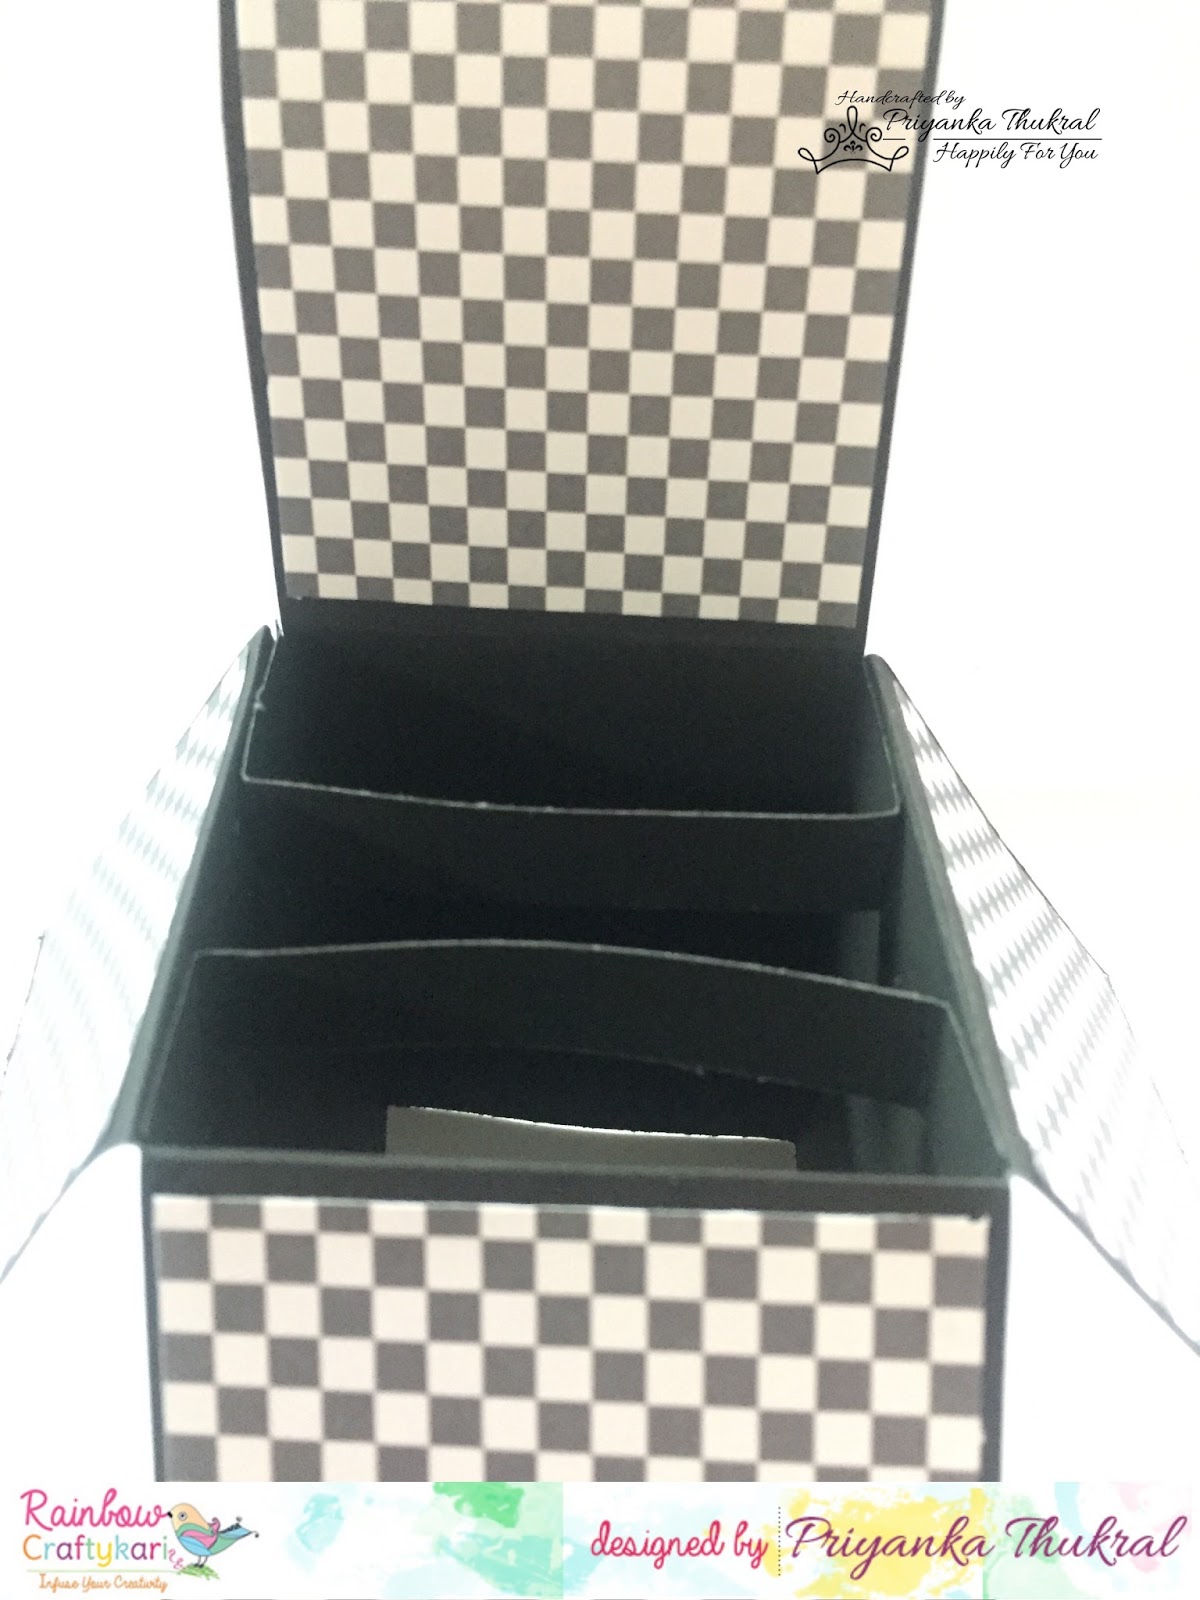
Today I am over again at the Rainbow Craftykari Blog and this time I am here with a step by step tutorial on how to make a Pop-Up Box.
I have been doing a lot of pop-up boxes in the last few months and I have always loved working on these..! Pop Up boxes are a flat card that opens up to a box with popping out elements.
To give you a glimpse of the project:
Let's begin:
Step1 for the base: I picked up a 10.5*6" cardstock & scored it at 2.5",5",7.5",10". Then I rotated the cardstock & scored at 2.5" which makes my upper part of the card (2.5") and bottom half (3.5").The last flap left in the end will be glued to the inner side to make the box. Following which I cut the scored lines half way through till 2.5" from the top to make the flaps.
Step2: I then cut two strips measuring 3.5*1" and scored them at 0.5" and 3". These go inside the pop-up box to hold the embellishments in the center.
Step3: Now I picked out the patterned papers from my stash and cut them in the sizes same as each section on inside & outside and adhere them to the box.
Step 4:
Then I took Clearly Besotted stamp & stamped the gorgeous little animals & sentiments and colored them using aqua water color pencils & fussy cut them.
Step5:
Now using the acetate sheets (easily available in the local stationary shops) I cut these into thin strips.
These are used to add the elements outside of the box which gives an impression as if the elements are hanging in the air because of the transparency of these acetate sheets.
Step6:
And the final step I added all the fussy cut elements onto the pop-up box and on the acetate sheets using glossy accents.
And TADA!!!! the box is ready... :D :D
Isn't it looking very cute???
Enjoy a few more close up pictures.
Materials Used: 1. Black Card stock 2. Clearly Besotted Stamp set 3. Versa ink onyx3. Patterned Papers ( from the stash) 4. Tim Holtz Distress inks
5. Aqua Watercolour pencils 6. Glossy Accent7. Fevicol
8. Acetate Sheet
Hope you all liked the card & enjoyed the tutorial. Until next time. ;)
Don't forget to participate in our ongoing challenge. Link your projects here.
Priyanka Thukral
Hello Everyone
Mounika Here Again, So much excited for my inspirational post on Rainbow Craftykari blog. Today I'm going to pump up your creativity. Have made Accordion mini album which would be great way to give as a gift to your loved ones and beautiful way to store your memories. It's simple and cute to make. So I've made one for my husband with me and my son's pictures.
Let's get started!!
To start with i cut down 4*4 size Papericous sigma cardstock, I must say it's an amazing cardstock for colors and stamping and randomly colored it with different distress inks and some photo transperent inks.
While assembling i used vellum as hinge between two pages ,took hinge of 2"×1.5" vellum before sticking panels together placed velum and stuck. Finally for embellishment i stamped Mudra butterfly stamp with different colors distress inks and cut down some frame from Papericous often paper collection and assembled my mini album
Some close ups of mini album
Hope my project inspires you....
Materials used
Papericous sigma cardstock
Papericous often paper collection
Vellum sheets
Ribbon
Mudra Butterfly stamp
Distress inks
Phototransperent inks
Foam tape
All the materials listed above are available at Rainbow Craftykari Store or you can pre order them by sending an email at rainbowcraftykari@gmail.com.
Hope you got inspired to create one yourself. Do join us in the Current challenge "The Blooms Magic". Looking forward to see your entries. Happy Crafting!!
Warm Regards
Mounika K