Showing posts with label Inspiration. Show all posts

Friday 12 May 2017

Beauty Inside The Blooms MM Canvas by GDT Mounika K

Hello Everyone


Mounika Here, happy to share one more  inspiration post for Rainbow Craftykari.  check our blog for ongoing challenge Blooms Magic. Today my project inspired my same challenge made this canvas mixed media


To start with, I had primed the canvas with light gesso, once its dry, I had started free hand out line of girl and than later stenciled using texture paste to create texture.  I've used two different kind of stencils here


Once it dry, had randomly splashed some photo transperent inks and lindy stamp gang sprays until i was happy with the coloring


For flowers, i have used punched flowers, die cut and some hand cut flowers, damped them at the back with some water and using my embossing tool to shaped the flowers .


And finally arranged the canvas with final touch-ups added some inka gold and microbeads here and there. Lastly, added the hand written quote.


Here are some close ups


Hope you all have enjoyed and inspired. Will love to see you all participate in our ongoing challenge "Blooms Magic"

Materials List:

canvas

gesso

texture paste

stencils

heartfelt flower die

punches

embossing tool

acrylic paints

distress inks

lindy stamp gang sprays

microbeads from my stash

inkagold

embellishments from my stash


All the materials listed above are available at Rainbow Craftykari Store or you can pre order them by sending an email at rainbowcraftykari@gmail.com.


Warm Regards

Mounika K

My blog link - http://craftdrama19.blogspot.in/

My fb page - https://www.facebook.com/McCrafts/

Wednesday 3 May 2017

Accordion Mini Album with Vellum Hinge by GDT Mounika K

Hello Everyone


Mounika Here Again, So much excited for my inspirational post on Rainbow Craftykari blog. Today I'm going to pump up your creativity. Have made Accordion mini album which would be great way to give as a gift to your loved ones and beautiful way to store your memories. It's simple and cute to make. So I've made one for my husband with me and my son's pictures.


Let's get started!!


To start with i cut down 4*4 size Papericous sigma cardstock, I must say it's an amazing cardstock for colors and stamping and randomly colored it with different distress inks and some photo transperent inks. 


While assembling i used vellum as hinge between two pages ,took hinge of 2"×1.5" vellum before sticking panels together placed velum and stuck. Finally for embellishment i stamped Mudra butterfly stamp with different colors distress inks and cut down some frame from Papericous often paper collection and assembled my mini album


Some close ups of mini album


Hope my project inspires you....


Materials used


Papericous sigma cardstock

Papericous often paper collection

Vellum sheets

Ribbon

Mudra Butterfly stamp

Distress inks

Phototransperent inks

Foam tape


All the materials listed above are available at Rainbow Craftykari Store or you can pre order them by sending an email at rainbowcraftykari@gmail.com.


Hope you got inspired to create one yourself. Do join us in the Current challenge "The Blooms Magic". Looking forward to see your entries. Happy Crafting!!


Warm Regards

Mounika K

My blog link - http://craftdrama19.blogspot.in/

My fb page - https://www.facebook.com/McCrafts/

Thursday 20 April 2017

Shaker Blooming Explosion Box by GDT Richa Maurya

Good morning Crafters!!

Today I am here to bring you some more inspiration for our ongoing challenge “Exploding Surprise”. Do check out the rules and guidelines for the challenge here.

I created this explosion box using Papericious “If Only” Collection. This explosion box can be a present for anyone you love. I have kept the theme floral and have added lots of flowers and butterflies.

First I created two layers and added pattern papers with distressed edges according to the color palette of the challenge.

On the first layer, I have added paper doilies and some simple punched out flowers. Photos can be added later. On the inner layers, I have added Scalloped circles from same paper pack and have stamped some love sentiments. Finally I have decorated these with some roses and leaves.

For the central 3D piece, I created a bed of handmade roses with butterflies popping out. The butterflies have been stamped on blue colored paper, fuzzy cut and attached using acetate strips. The bed has been created using a used-up tape roll covered with green glittery tape and decorated with leaves and pearls. Finally,I have added some diamond dust to give the blooms some sparkle.

On the lid, I have added a shaker element over a distressed paper doily and have decorated it with flowers and butterflies.


Materials Used:
Black Cardstock
Papericious If Only Paper Pack
Large Flower Punch-for making the roses
Paper Doilies
Acetate sheet
Butterfly stamp
Distress Inks
Diamond Dust
Craft scissors
White Glue
Double sided tape

All the materials listed above are available at Rainbow Craftykari Store or you can pre order them by sending an email at rainbowcraftykari@gmail.com.

Hope you got inspired to create one yourself. Do join us in the ongoing challenge. Looking forward to see your entries. Happy Crafting!!

Regards,
Richa Maurya
http://apaper-palette.blogsot.in

Friday 14 April 2017

Birthday Double Surprise Explosion Box by DT Aditi Mahajan

Hello guys,

Today I'm at the Rainbow Craftykari Blog, with an inspiration for the ongoing challenge. Do check the challenge here.

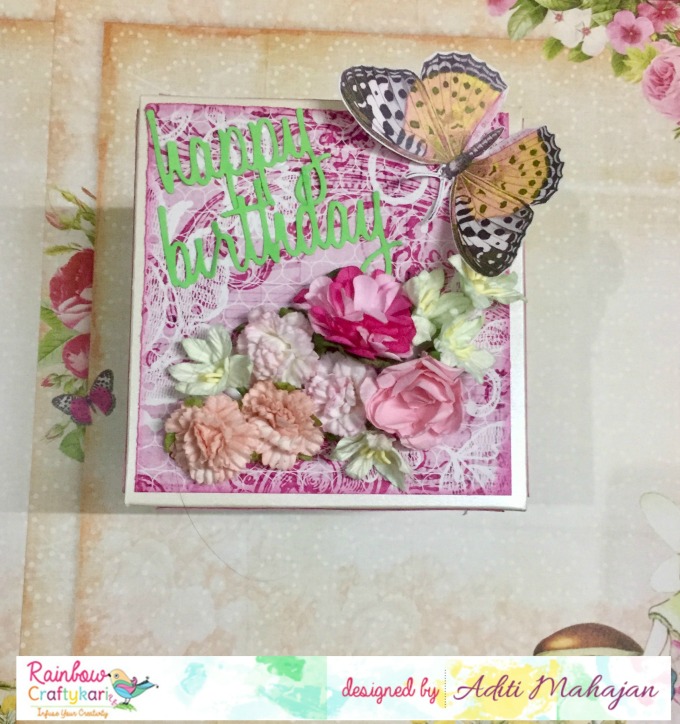
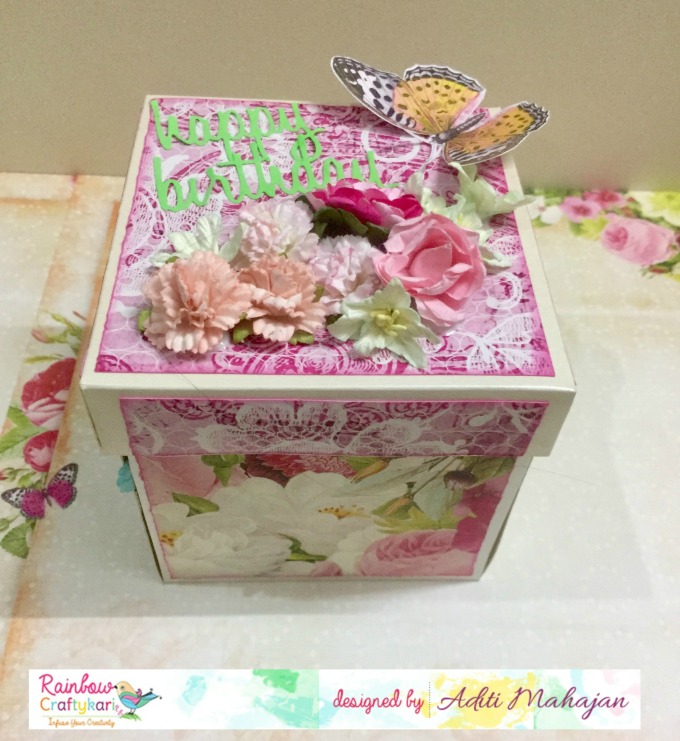
Onto the creation. I've created a Birthday Theme Explosion Box for a girl. 

I've used the Fairy Land Paper Pack by Papericious for this box. 

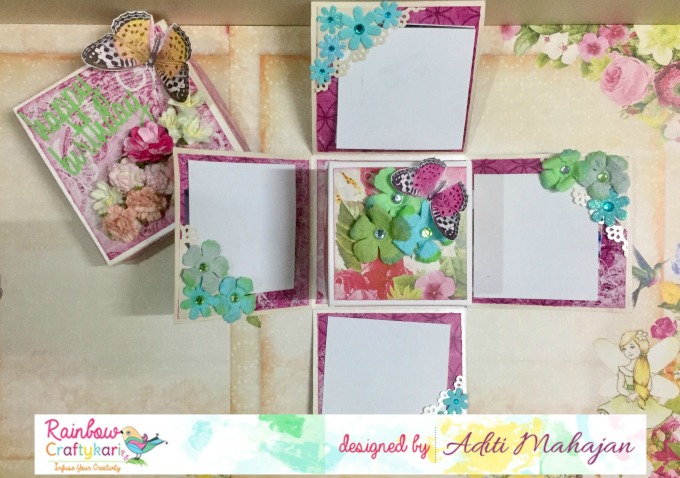
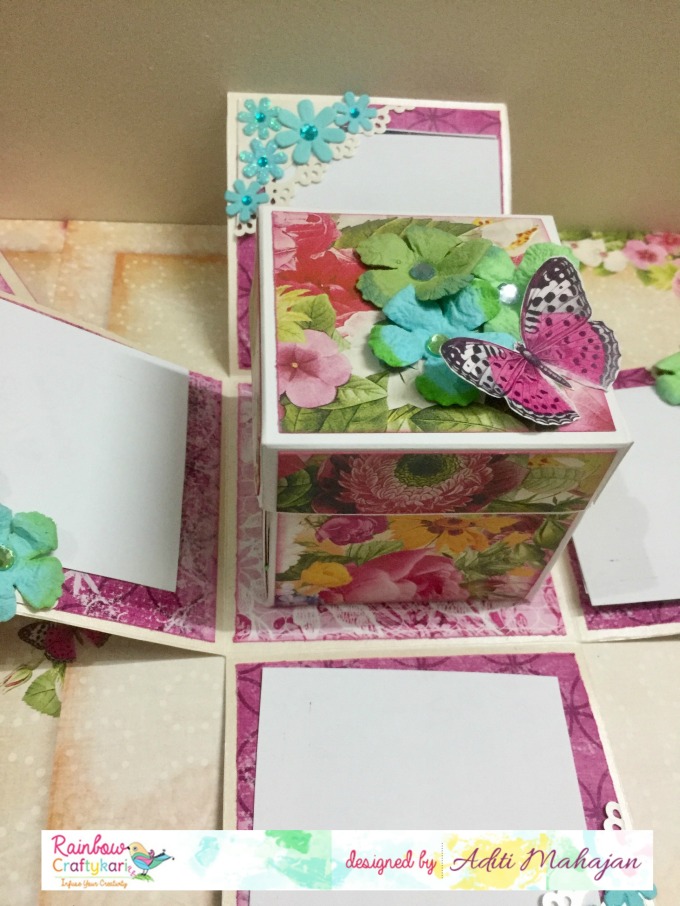
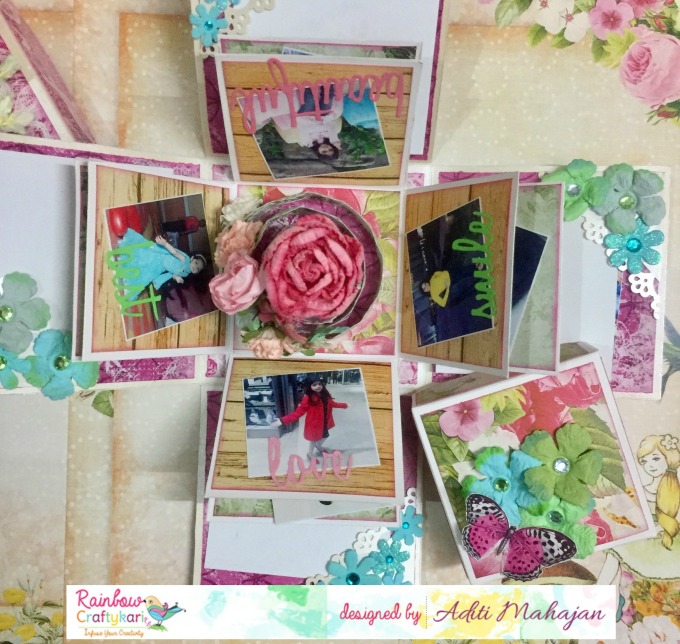
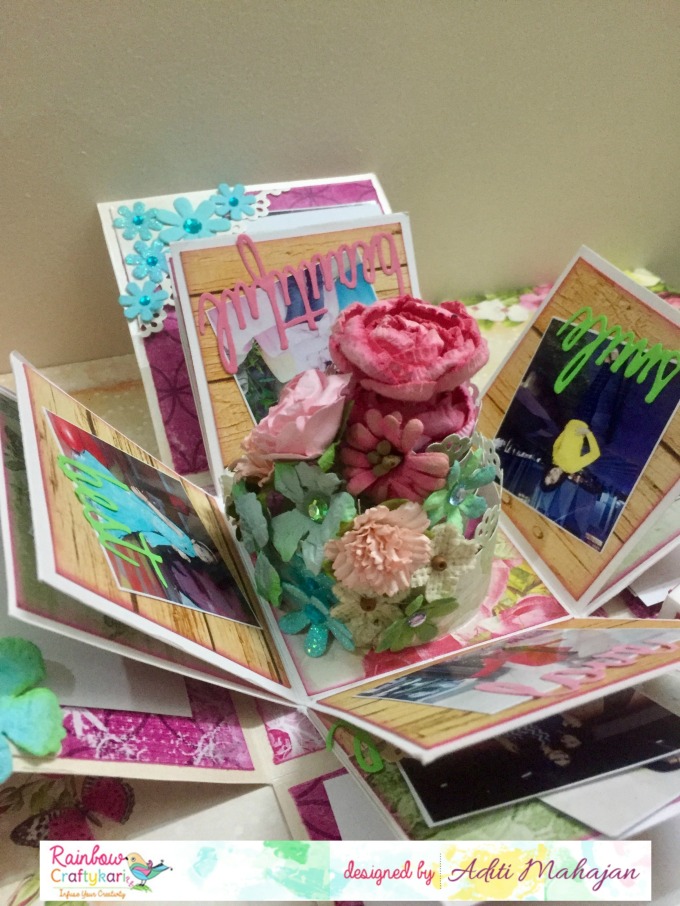
The first box, opens to one layer, with triangular pockets (made using pearlescent cardstock and Martha Stewart border punch) in the pack on the four flaps to insert photos. We've decorated these with some flowers. Inside this, is a smaller box, that opens to two layers and a decorated 3 D cake inside. I've decorated the inside with flowers, and some sentiment words like beautiful, love, enjoy, etc die cut using sizzix dies (on cardstock). I've followed the colours of the challenge for this creations. Some embellishments have been fussy cut from the sheet in the paper pack. The patterned paper was distressed before adhering to the base. 

FullSizeRender 90
FullSizeRender 95

Here are pictures of how it looks inside:

FullSizeRender 93
FullSizeRender 96


FullSizeRender 89
FullSizeRender 94

Supplies used:

Papericious- Fairy Land Collection
Sizzix- Celebration, Adventure and Friends Set
Assorted flowers
Martha Stewart Border Punch
Distress Ink- Picked Raspberry
Pink and Green Cardstock

Hope you're inspired and looking forward to your creations for the challenge:)!


All the Materials are available at Rainbow Craftykari Store, If something you are missing out, you can Pre-Order us at rainbowcraftykari@gmail.com

Regards,
Aditi
Dots To Lines

Friday 7 April 2017

Floral Explosion Box by GDT Karthikha

Hello Crafty Folks,


I'm excited as I get you an inspirational project for this month's challenge - Exploding Surprise! Do check out the challenge post for all the rules and guidelines.


Direct on to my creation! I wanted to do an explosion box that will suit any occasion, be it birthday, anniversary, love, etc. So the best option was floral! I've used all the colors from the color palette for the challenge. The different shades are seen in the patterned papers and flowers used.

I started by creating the 3 layers with pockets to hold the tags. I have a mix and match of patterned papers from Papericious and other brands to suit the color theme. The middle 3d object is a small box filled with flowers. This can be used to hold tiny gift items too! A surprise inside a surprise J For the inserts, I have die cut scallop stitched circles and rectangles. The big circle tag has a mini flower brad attached along with pink satin ribbon. The middle insert is a rectangle die cut, which has a holder in the form of a flower. For this, I’ve punched out 2 flowers and attached them back to back with the tag sandwiched in between. The small circle tag has a pearl string attached to hold it.

For the lid of the box, I have used a chipboard element colored white with gesso. I kept it white to pop against the pink background. I’ve then added flowers matching the color palette


Here is a small video to show you the box in real!


List of materials used:


Pink cardstock
Papericious – Pretty Basics patterned paper pack
Papericious – Fairy Land patterned paper pack
Patterned paper – blue and white floral
White Gesso
Chipboard
Colored flowers – blue shades, pink and white
Silicon Glue
Liquid glue
Tacky tape
Gina Marie Scallop Stitched Circle Dies
Gina Marie Scallop Stitched Rectangle Dies
Pearl string
Pink satin ribbon
Mini flower brads
Jef flower punch
Scissors

Hope my creation inspires you to create one :) Happy crafting and do participate in the challenge!


Have a nice day :)

Warm Regards
Karthikha

My fb page link - https://www.facebook.com/KsKardsAndKrafts

Thursday 30 March 2017

Vintage Mini Album by DT Nikkita

Hello Everyone,

Hope you all are doing good.

This is Nikkita Today. Crafters, what do you do to preserve your memories, like we often click photographs, get them framed or make an album. How about making your on scrapbook album to give a handmade touch to your beautiful memories. Today I'm going to inspire you with a Vintage Mini album, so that all you can try easily and gift to your loved ones or preserve memories of your life.
Here we go


Instructions:

Step 1 - Take 2 pieces of chipboard measuring 6 by 6 inches for the base and for the spine take 2.5 by 6 inches. Cover it like book using cardstock and tacky tape.


Step 2 - For the closure take two ribbons and stick them in the middle and cover the whole chipboard using cardstock.


Step 3 - For the pages I used hidden hinge binding system and I have left a gap of 1/2'' between every hinge.

Made 6 pages total,

Page size measures 5.75 by 5.75''

Made 6 pockets measuring 5.5 by 5.5''.


Step 4 - Cut pattern paper as per your choice and distress it with distress ink vintage photo to give a complete look.

I use tacky tape/tacky glue for sticking my pattern paper.


Step 5 - To Decorate Cover, i simply used a Leather paper which is locally available in my near stationery store, I adhered MDF Cut Out, Die cuts, Mulberry Flowers and Resin Charm to give an Vintage look. 


Step 6: Decorate the inside pages as per your choice.  


Tip: When you'll adhere MDF cutout, let it sit for few time to get it adhere with base strongly. I've used Aleene's Tacky Glue


Here are the Close ups 


 Hope you guys liked it.


Materials used-

Emphera collection from Papericious,

Resin embellishments,

Die cut embellishments,

Mulberry flowers,

Metal corners,

Stamp sentiments,

Die cuts,

Satin Ribbon,

Border punch out from Ek success,

Brown Leather paper.


All materials are available at the Rainbow Craftykari Store and you can also get them on pre order.


Regards,

Nikkita
https://www.facebook.com/bloomingcraftskolkata/